Showing posts with label Penny-Pinching Tips and Tricks. Show all posts

Monday, May 7, 2012

Packing Tips & Tricks: Save Money and Time on your Move

The end of the semester is here! No more finals, no more books, no more all nighters .... at least, for a few months maybe. For a lot of us, that means it's time for the dreaded move. Whether you're just packing up your dorm room and it fits into the back of your car (lucky) or you're packing up your entire life and moving it across the country (that's me at the moment) packing can be a daunting, not to mention expensive, task. These tips will help you learn how to save money AND time on your move!


  •  Before you pack, get rid of EVERYTHING you don't need. For clothing, if you haven't worn it in over a year, donate it to Goodwill (just drop it off - it's super easy.) If it's cute and in good condition,  try Plato's Closet - they'll also take shoes, bathing suits, jewelry, DVDs, home furnishings, and even some bath stuff. For random junk, add it to your Goodwill pile. If it's too big to move or you'd rather give it away to someone, post it on your local Freecycle or your local Craigslist "Free" section. As you're packing, put everything you don't want or no longer use in a pile, and then either donate it to Goodwill or post it on Freecycle for immediate pick up. Of course, if it's trash, throw it away!
  • Paper is heavy - limit the amount you pack. We've all had times where we save a semester's worth of notes "just in case." Maybe we didn't want to throw away the ridiculous amount of notes we'd slaved over, or maybe we thought we might look back on them later. Well, no one ever looks back at their notes from college classes. Recycle your notes. Keep your textbook if it might be useful for a future class or your career, or better yet, sell that too (try Amazon or your local campus bookstore buy-pack program). Magazines are the worst of all - they are SO heavy and somehow I always seem to accumulate so many of them! Get rid of magazines by donating them to the campus fitness center, a doctor's office, a school or daycare center (for crafts!), the local library, putting them outside your door with a sign marked FREE! TAKE SOME! or just list them on Freecycle for pickup. Or, of course, recycle them!
  • Don't pack food unless it can honestly be used after the move. Try to limit your grocery shopping to the bare minimum in the month before your move, and when you're packing, only include pantry items that will be useful after the move, particularly if your stuff will be in storage or you'll be eating someone else's groceries all summer long. Canned items are good contenders for packing, but they're super heavy, so eat those up if you can! Also consider the chance that the food may attract bugs, so pack it in heavy duty plastic and seal it well.
  • Have plenty of packing supplies on hand. You'll need boxes, tape, scissors, a permanent marker, garbage bags, and something to pad items out, such as bubble wrap, empty shopping bags, towels and linens, or other fabric. You can certainly pay money to get boxes, but I prefer to ask at a grocery store or even at a dorm or cafeteria if I can have some of their boxes. Check if there's a cardboard recycling center on campus or nearby to score even more boxes! At Indiana University, there is a cardboard recycling bin behind Collins LLC.
Look how much FUN they're having! Yay moving!
  • Pack like items together and label the boxes. Hopefully the items will be near one another to make that easier, but if not, gather them all into the same box - such as "Kitchen," "Shoes," "Desk/Office," "Crafts," "School Supplies" and so on. It'll save you time when you unpack and make your life easier. Label the boxes with a permanent marker after you're done.
  • Play Tetris with your stuff, but fill the crevices and gaps with socks. Try to fit things together in boxes as best as you can - big stuff on bottom, small stuff inside of big stuff and everything sort of Tetrised together. But of course your stuff isn't perfectly shaped to fit together, so fill in the gaps between items with socks. Doesn't have to be socks - dish towels, underwear, or anything else small and made of fabric will work well too. This will help pad everything out so that it doesn't shift, move and potentially break during the moving process. Plus, you won't have to pack your socks later! 
  • Keep a box or suitcase to the side with stuff you'll need immediately. Some clothes, toiletries, and whatever else you might find yourself living off of for a little while will be very useful after you get moved and all of your stuff is neatly packed away. 
  • Wrap all fragile items in paper, bubble wrap, shopping bags or fabric. Moving can be rough on fragile items such as plates or framed pictures, so wrap them well before putting them into a box. Use newsprint or other paper, bubble wrap, plastic grocery bags or fabric such as towels or even clothes to wrap and protect each fragile item before placing it into a box.
  • Choose the most cost efficient moving solution. If you can carry all of your stuff to your car, fit it in your car and drive it yourself, that's going to be your best bet. But for the rest of us, you might want to look into renting a truck or van (or having a parent rent it for you), or even a U-Haul. If you can't carry the boxes yourself, post on your campus classifieds or possibly Craigslist to find someone willing to help you move for pay - $20 an hour or a $100 flat fee should be sufficient. Or ask your strongest friends to help you out. Hiring professional movers is the easiest way to move, but the most costly. If you hire professional movers, remember that they are being paid by the hour, so make sure you're fully packed BEFORE they arrive, and everything is ready to go to be as quick and efficient as possible and save you money. 

Did I miss something? Do you have a foolproof packing tip I should know about? Post it in the comments!

Want to know about new freebies, samples, deals and money-saving as soon as they happen? Follow The Broke Student's Guide on Facebook, Twitter and Tumblr.

Sunday, April 1, 2012

Save Gas, Save Money: 10 Tips for Getting More Miles Per Gallon

So by now you've probably noticed the ridiculously insane prices of gas. There's no way around it for many of us who have to drive to class every day during the week, not to mention running errands, driving to work, driving to friends' houses - there's no way around it, gas is a huge expense for most of us! But take heart, there are was to conserve your gas, which means filling up less often and saving more money! To learn how, read on.

 1. Lay off the gas pedal! Every time you touch your gas pedal to accelerate, you're using gas - meaning you're spending money. The less you touch that pedal, the more you save! So if you see a stop light up ahead, take your foot off the gas. If you're rolling down a hill, take your foot off the gas. If you're in traffic and the car in front of you moved forward, don't touch that gas pedal - just let your car roll! The less you accelerate (and the less you have to brake, which means you wasted gas) the more you save. Practice letting your car coast as you go down a hill, come to a stop sign or red light and during traffic rather than hitting the pedal and watch the savings add up. And avoid road rage - speeding, rapid acceleration and rapid braking can lower gas mileage by 33 percent at highway speeds and 5 percent while driving in the city. 

2. Clean out your car. If you needed a good reason to clean it out, this is it - carrying around extra stuff in your means your car has to work harder and use more gas, especially if your extra stuff is heavy. If you're guilty of having a full trunk or carrying around boxes of stuff that you don't really need, now's the time to move it all inside! You can save up to 9 gallons of gasoline per year – almost $40 – by removing an extra 100 pounds of unneeded items from the trunk.

 3. Give your car a checkup. When was the last time your car got checked over? Do you need an oil change? Are your brakes OK? Do your tires need air? ... No idea? You could save gas by getting a tune-up, and it's FREE to get a checkup at most car places (Midas will give you a FREE break check and check the rest of your car for FREE too! It takes about an hour as you wait) or at your dealership. Make sure your car is in tip-top condition so you are getting the maximum miles per gallon.

 4. Crack a window. Operating the air conditioner on "Max" can reduce mpg by 5 – 25% compared to not using it. Open up the window and enjoy the spring breeze instead! Note: this is gas efficient at low speeds, but not efficient at high speeds, so instead, try to keep your air conditioner on a lower setting if you're on the highway.

 5. Combine trips and plan ahead. Ever found yourself driving to the same place twice in one day? Well, that's a waste of gas if you can combine those two trips into one! Plan your errands on your way to or from work or school, combine your errands into one trip and plan the most efficient route. If your errands can wait, make one day your "Errand day" and get everything done all at once so you don't have to make multiple trips. The less you drive, the more gas you save!

 6. Carpool. Is there anyone who can chip in for gas for a ride to class each day? Maybe your roommate needs to go to the grocery store and you guys can split the cost of gas. Or maybe you can bum a ride to a party with a friend. However you do it, carpooling saves money. If you're taking a road trip or going home on the weekend, post about it in your school's classifieds or see if there's a ride-share section online or in the paper (or, try Craigslist). The more people you ride with (and divide up the gas with), the cheaper your trip is! 

7. Don't Speed. Unless you're on the highway, don't go over 60 mpg: each five miles per hour over 60 mph is like paying an additional 24 cents per gallon for gas. And on the highway, make sure you're driving at the speed limit - speeding tickets will cost you around $200, and that's NOT worth getting there 5 minutes faster!

 8. Don't idle your car. It's bad for your wallet and it's bad for the environment. If you're sitting in your car, crack a window and turn it off, whether your parked or just waiting for a train to pass.

This is one way to save gas money, but I don't recommend it.
 9. Consider traffic conditions. If you find yourself driving home in rush-hour traffic every day, spend some time reading a book or enjoy a coffee in the sunshine before you drive home to avoid traffic. Stop-and-go traffic is incredibly gas inefficient, involves a lot of idling, causes stress and takes forever. Avoid it as much as you can, even if it means waking up a few minutes earlier.

 10. Use other means of transportation. Sure, it might not be as fast, but taking the bus or walking saves you a LOT of gas! Most campuses have free bus service available for students, and you can usually walk just about everywhere on campus. If you've ever driven 5 minutes to class just because you didn't feel like walking, definitely reconsider: walking is healthy, it's nice and warm outside, and you'll be saving money. At the very least, take the bus! Heck, you have to pay for it anyway in your tuition, might as well use it.

 When you do need to fill up, download the GasBuddy app for your smart phone to find out where the cheapeast gas is near you, or use the GasBuddy website! Just don't go way out of your way to save a couple of cents - that would be a waste of gas.

 Other ways to save on gas:

  • Pay with cash. Some gas stations give a discount for this.
  • Use the Kroger Fuel Rewards program to save on gas at Kroger. Some people like to buy a $50 gas gift card just to get the $.10/gallon discount, and then use it to pay for the gas! How's that for clever? 
  • Do some mystery shops at gas stations! Or, plan a mystery shop on a trip or errand to help pay for your gas. Learn more about mystery shopping here. 
 You can read some more gas-saving tips in this article and also in this one.

Want to know about new freebies, samples, deals and money-saving as soon as they happen? Follow The Broke Student's Guide on Facebook, Twitter and Tumblr.

My favorite paid-to site is Swagbucks. I earn at least $25 in Amazon Gift cards each and every month! Read more about Swagbucks in this entry. 

Monday, March 5, 2012

Save Money on Spring Break: Tips and Tricks for College Students

Ah, Spring Break. That one glorious week in March where all bets are off - the one week we can relax and leave midterms and upcoming finals behind us as we pile into a car and drive off into the sunset to our magical vacation in paradise.  At least, that's the idea. I'm sure many of us are still scrambling around trying to figure out what the plans are for Spring Break, cursing our professors for assigning projects that are due the Monday after Spring Break ends (WHY, professors? I mean really!) and trying to figure out how to fit several 24-packs of Natty Light  sleeping bags and suitcases into one tiny car, and of course, how to pay for the whole thing. Well, I'm here to help - with the money aspect, at least! Here are some tried and true tips for saving money on Spring Break! Find all the supplies you might need with coupons for Buy.com for your spring break!

1. Drive, Don't Fly: Although gas is at an all-time high, driving to Spring Break is a better bet than flying. This is because you can fit more people into a car, which means the gas is split several ways, making the trip much cheaper. A 1700 mile round trip costs as much as one plane ticket (about $180-$200, roughly) but splitting it up even once or twice significantly slashes that cost! So find a friend with a car that gets decent gas mileage (you'll want at least 30 mpg on the highway!)  and offer to share the cost of gas.

2. Fill Up for Cheap: We've all heard those road trip horror stories, where it's 3am, you're driving through corn fields in the middle of nowhere, the tank is on empty. Suddenly, like the gates of heaven, the neon lights of a gas station appear - only for the price to be $1.00 a gallon higher than the last gas station you passed 2 hours ago. Don't let this happen to you! There are sites - such as Gas Buddy Trip Calculator - that will map out the cheapest gas on your route in advance, so you can make sure you're getting the lowest price possible BEFORE you run out of gas in Nowheresville, USA.

3. The More the Merrier: I already mentioned that splitting the gas with your car-mates reduces your cost, but splitting EVERYTHING with EVERYONE is even cheaper! Whether you're renting a cabin or camping in the woods, the more people there are, the cheaper it is. For example, one year I went with a group of 15 down to Daytona, FL. We added up all of our costs in advance - including gas for the 3 car caravan and 3 hotel rooms in a hotel RIGHT on the beach  - and then split it evenly 15 ways. Total cost for our trip? $120! Whether you're renting a hotel room or a cabin, the more people you can cram in there (legally, of course - check when you make a reservation so you don't get hit with fees or, worse, kicked out) - the cheaper everyone's price will be! So go ahead and invite your friend's girlfriend, her brother, that cute guy from Biology and your RA.

4. Research Before You Get There I know the word "research" kinda makes it sound like homework, but this is FUN homework! Look up stuff like the local scene, clubs, bars, restaurants, tourist attractions and whatever else is cool to do at your destination BEFORE you go. Not only will you save valuable relaxing and partying time once you arrive, but you can also find out what your costs will be- and what places you should avoid, like the botanical gardens that cost $15. You might find some really fun cheap stuff that you didn't know about! Also think about things like transportation (how will you get to/from the bars? Are they walking distance or do you need to get a taxi or arrange a DD to provide a shuttle?) cover charges, and anything else you might not be thinking of yet but will have to pay for during your trip so you can prepare and scrounge together as much money as you need.

5. Save on Food No, you don't have to bring a case of Ramen noodles with you (though you definitely could, you can make it using the hotel's coffee pot or just very hot tap water. I know this from lots of experience.) but food tends to be the highest expense on a vacation, just because everyone wants to eat out  every single meal, 3x a day. It adds up! Save money on food by doing the following:

  • Pack a cooler in the car. That way you don't have to stop at Taco Bell every time anyone gets hungry, or spend a bunch of extra money on overpriced snacks at gas stations. 
  • Go to the grocery store as soon as you get to your destination! Buy stuff that you can snack on throughout the week and eat for breakfast, especially if your hotel doesn't provide any food. Get some sandwich making stuff for easy, quick, cheap meals even if you don't have a way to cook. If you don't have any amenities like a fridge, that cooler will come in handy here - fill it with ice or cold water.  If you're renting a cabin with a fully functional kitchen, look up some cheap recipes (Like these) and cook dinner together as a group! It's so much cheaper than eating out, and WAY more fun, too. 
  • Buy some Restaurant.com coupons. Restaurant.com is a great way to save money on eating out, especially with a big group. The more you spend, the more you can save with the coupon! Search for restaurants in the area you'll be staying and pick up a few for dinner. Although full-priced coupons are $10 for $25 off your meal, the site almost always has coupons available that slash those prices. Right now, until 3/8/12, use the coupon code TRIP to slash 70% off your total purchase. Now you can eat out without breaking the bank!

6. Pay for Everything with Mystery Shopping Remember the post I wrote on mystery shopping? And how I was like omg, this is the great thing ever? Well, allow me to reiterate that. This year, I am paying for the entire gas bill for my Spring Break vacation - with mystery shops. And I don't mean like I'm saving up. I mean I'm literally doing mystery shops all the way down and back -at travel centers and gas stations! Travel centers & gas stations are one of the most bonused shops out there, because they tend to be in the middle of nowhere - and that means you get paid tons to do them! You'll find travel center shops at Intelli-Shop.com and BeyondHello (contact me for a referral link to BeyondHello) gas stations at Corporate Research International  (contact me for a referral link to CRI) and Ritter Associates. How much does a travel center shop pay, you ask? Oh, about $20. Do 5 of them and you just got $100. Sound good? It gets better - you can schedule food shops and more on the way to and at your location! Schedule a few fast food shops with MarketForce. Just about every mystery shopping company has some good food shops available - Corporate Research International has about a million - and some, like Amusement Advantage, even have theme parks, zoos, ice skating rinks, and more! (Give my email - im.so.rad[at]gmail.com - during signup at Amusement Advantage, please! I might get a referral bonus.) The options are limitless - not only are your expenses paid for, but you get PAID on top of that! Read my post about Mystery Shopping for more details.

7. Pack Everything You Might Need I mean, don't pack so much that no one else can fit their luggage in the trunk. But you don't want to arrive at the beach only to realize you've forgotten your towel, swimsuit and sunscreen and need to take a $50 trip to Target. Include all toiletries, camera, plenty of clothes, a few pairs of shoes, a towel, and maybe a deck of cards, some DVDs or a hookah for some free entertainment. Remember to bring a pillow and blanket, especially if your sleeping situation is going to be cramped and possibly involve tents or the floor. And pack clothes for multiple weather conditions - things can get weird this time of year, and you don't want to have to buy a jacket because Daytona Beach happens to be 40 degrees in March (this is a true story, it is super cold there.)

8. Sleeping Situations: I have mentioned a couple possible sleeping situations in passing, but let's run down the list of options.

  • Hotel: Easy, convenient, posh, practically risk-free. Most will be cool with having a large group of people stay in one room as long as there's a hefty security deposit, but always check first. 
  • Cabin: Renting a cabin is a great idea for large groups. You'll also be able to cook, which means you can save money on food. These tend to go fast though, so don't just show up hoping there's a vacancy!
  • Camping: If you're outdoorsy, and your friends are cool with roughing it for a few days, campsites are insanely cheap - think $4 a night cheap. You'll need your own camping equipment (tent, sleeping bag, supplies for cooking, etc) but most campsites do have restrooms and showers, and some offer electricity for a higher fee. Befriend a few Eagle Scouts and stock up on camp-fire gear to make the most of this vacation!
  • Couch Surfing: Yes, this is a real thing. Personally I've never tried it, but my boyfriend and his friends used this site for Spring Break one year. They weren't robbed or killed, so that's good, but this certainly isn't the most comfortable sleeping situation. Don't do it alone, and be wary of your surroundings and belongings. Although most people using the site are probably harmless and totally cool, playing it safe is always the best bet. If you and your friends are looking for adventure, meeting new people, and don't mind sleeping on couches and potentially sketchy situations, this one's for you. (Plus: totally free!)
  • Hostels: Cheaper than a hotel and less potentially scary than Couch Surfing (unless, of course, you've watched that one movie .... you know the one I'm talking about) hostels are another option for cheap sleeping. Use this site to search for hostels, and DON'T watch that movie if you haven't seen it already. Just don't do it!
9. Get a Groupon: Like Restaurant.com, Groupon can be a great way to save money on something you'd probably pay full price for anyway. Right now they have a special Spring Break section with some AMAZING deals on awesome beach resorts and hotels, that are ACTUALLY AFFORDABLE. (Ridiculous!) They also have really cool activities for cheap, like mini golf, museum tickets, yoga, and clubs. Just search in your area to find some awesome stuff for your entire group to do, on the cheap!

10. Have a Staycation: The cheapest way to spend Spring Break is by staying at home. Not only will it allow you to finally catch up on the reading you've been putting off for your classes - and possibly time to do some laundry - but you can actually have a lot of fun at home! Pretend you're a tourist and visit some places you've never been. Grab a friend and explore a new part of town. Get a local Groupon and treat yourself to a spa day or salsa dancing class. Find a new restaurant you've never eaten at before, get a Restaurant.com coupon and order drinks and dessert. Go camping for a night, go fishing and have your very own campfire. See if they have zip-lining in your area (my new favorite thing) or go sky-diving or something crazy! Then when people ask how you spent your spring break, you can say "I went freaking sky-diving!" instead of "I stayed home and did homework." (You secretly did both! Ha!) Staying home CAN be cool!

How are you going to spend Spring Break, and what will you do to keep your costs down? Tell me in the comments! As for me, I'll be in Orlando, FL! I can't wait!! 


Want to know about new freebies, samples, deals and money-saving as soon as they happen? Follow The Broke Student's Guide on Facebook, Twitter and Tumblr.

Friday, February 24, 2012

Broke and Beautiful: Tips and Tricks to Save Money on your Beauty Routine


Being broke doesn't mean you have to LOOK broke. As college students, it's a requirement to look put-together for career and networking events such as career fairs or even class projects. This can be tricky when you're on a tight budget, but it's not impossible! Here are some tips and tricks to save money on your everyday beauty routine. And here are some possibilities to save on brand name beauty products through these coupons for Macys.


1. DIY Tinted Moisturizer: Tinted moisturizer - a lightweight, sometimes sheer foundation that moisturizes your skin - has become a hot product, especially for the summertime. It's my go-to product for those days when I'm super bored/lazy/tired/have class in 5 minutes/want to apply foundation and moisturizer at the same time (so basically always). But tinted moisturizers are pricey, often WAY more expensive than either moisturizer or foundation. Chances are, you already have a foundation in your color and a moisturizer that you like, so here's how to make your own tinted moisturizer: combine them. Yup, it's that easy. You can put them in their own little container or just mix a drop of each on the back of your hand before you apply it to your face. Voila! Tinted moisturizer.
  • Even Better: Make your tinted moisturizer multi-task even more by adding other products to it such as self-tanner or tea tea oil (for acne - but don't add regular acne cream because it tends to flake). Anything you put underneath your makeup can probably be added to your tinted moisturizer to save time and keep you from buying multi-tasking products that you can make yourself!

2. Apply your makeup right: Using the right applicators to apply your makeup can make the difference between smooth, blended makeup and a streaky mess. It can also make a difference in your wallet - using a sponge to apply makeup sucks up the majority of your product, leaving most of it in the sponge instead of on your face - aka wasting your money! Sponges also tend to grow bacteria and must be thrown out frequently, meaning you have to purchase more sponges, which adds up. Instead, use clean, dry fingers to apply foundation, moisturizer, and concealer. Your hands (which are free) won't absorb as much product as a sponge, and your body's natural warmth will help the product sink into your skin.
  • Even better: If you use makeup brushes to apply your makeup, make sure you wash them frequently with cold water and soap (or shampoo, or face wash, etc). Washing them more frequently helps the brushes work better, avoids dirt and oil buildup which leads to acne, and ensures no bacteria growth. Use cold water because hot water loosens the glue which holds the brush together, causing your brush to fall apart over time.
3. Get sparkly white teeth: Teeth whitening can cost an arm and a leg, but it doesn't have to! The primary ingredient in every whitener - be it at your dentist or the pharmacy - is hydrogen peroxide. The secondary ingredient is typically baking soda. You probably know what I'm about to say, but here it is anyway: you can make your own teeth whitening paste by combining hydrogen peroxide and baking soda. These two magical products are available for around $1 at your local grocery store, pharmacy or dollar store! Just combine them and use it in addition to or instead of your normal toothpaste for super white teeth. (Note: it tastes gross, so you might want to add some flavoring or mix it with your normal yummy toothpaste or mouthwash.)

  • Even Better: You can use hydrogen peroxide as a whitening mouthwash. It won't give you that tingly feeling or make your breath minty fresh, but it WILL whiten your teeth. You can also use it to help clean out your ears and sanitize cuts. You can use baking soda to wash your hair and your house! Who knew such cheap products were so amazing?

4. When it comes to your face, less is more: For those of us with "problem" skin (oily, acne prone, flaky, etc) our tendency is to buy tons of "miracle" products to try to fix our face. We buy special cleanser, moisturizer, treatment cream, toner, and more for our face and slather it all on there. If it doesn't work, we buy different products and try again. The result is an endless cycle of expensive products that aren't helping anything and are, more likely, creating the very problem we're trying to fix. Let me explain. If you happen to have acne-prone or oily skin (like me) you might be drawn to products that promise to soak up all the oil in your face, dry it out, treat all of the acne with strong acids or peroxides, and leave us with clean, clear skin. Your skin might feel tight after you wash it, but end up an oil slick within hours, resulting in zits and shininess. So maybe you go wash your face again to get rid of all that oil - only to find yourself repeating the cycle over and over. This is because your skin actually NEEDS that oil! It needs to be hydrated so that it can move and stretch and do all of the things skin does. Without oil, things would be painful and uncomfortable. Over-drying our skin causes it to overcompensate by producing MORE oil than we might actually need, creating that oily mess that can lead to acne. If you have oily skin that gets dry and flaky in the winter, this applies to you most of all. Stop drying out your face! Stop stressing out your skin with too many harsh products! Just let it do its thing! 

         Now, I don't want you to have dirty skin - but you can cleanse and treat your skin WITHOUT the harsh chemical cleansers. Try using baby wipes instead. Baby wipes are the cheap version of makeup-removing towelettes, and they also tend to be infused with aloe, vitamin E, and other nutritious stuff for your face. They are designed not to irritate sensitive skin so they don't stress and upset your skin (especially the "unscented" or "sensitive skin" types.) And they do just as good of a job at cleaning off the day's makeup and dirt as your harsh, chemically cleanser would, without stripping your skin of its natural oils and leading to too much oil production. If you're skeptical, try this experiment for a week: use baby wipes in place of your cleanser.  Moisturize afterwards, and spot treat any acne with your usual spot treatment (DON'T slather it all over your face, though!) Check if there's a difference in your skin at the end of the week - most likely, it's a little bit less dry and flaky, a little bit less oily, and a little bit more clear.  Keep using those baby wipes and you'll find that you never need to buy an expensive cleanser again. Just make sure you moisturize and use those baby wipes every day, and you've have clear, beautiful, unstressed skin at a fraction of the cost in no time. (PS: if you  also use the DIY skincare treatments below, your skin and wallet will thank you!)

5. Get the most out of your nail polish: Have you ever opened up your nail polish collection only to find that your favorite colors are clumpy, flaky, or just plain dried out? Save yourself the cost of new nail polish by saving those polishes with this nifty trick: just add nail polish remover! I know it sounds strange, but adding a few drops of nail polish remover as needed will make out your polish and make it last much, much longer. If it's an older polish, you might have to do this before EVERY application - but at least you'll be able to finish out the bottle instead of throwing it away only half empty! Go on, try it - what do you have to lose? You'd just be throwing that polish out anyway!

6. Natural (and affordable) DIY beauty solutions: You can give yourself a spa day just using stuff you already have in your house! If you don't have these ingredients, they aren't very expensive and can be purchased at any grocery store.

  • For Your Skin
    • Apple Cider Vinegar makes a great bacteria-killing toner for acne-prone skin. More details here
    • Witch Hazel makes another excellent toner! Apply it to a cotton ball to cleanse the dirt from your pores. More details here
    • Green Tea makes yet another great toner, especially for oily skin. Read some reviews here
    • 1/2 tsp. of sea salt + 2 egg yolks + 1/2 cup of yogurt = Toning Mask! Add all ingredients, apply to face and let dry. This is an exfoliating, tightening and soothing face mask.
    • Sea Salt + Olive Oil = Exfoliating Scrub! Add some vanilla or yummy smelling scent to overpower the smell of the olive oil. The Dollar Tree has some good smelling oils in their candle aisle. Use this scrub on hands, feet, and anywhere your skin needs exfoliating moisture.
    • Aspirin + Honey = Exfoliating, moisturizing face mask. Great for acne-prone skin. Instructions Here
    • Coffee Grounds make an antioxidant-rich, de-puffing exfoliant for face and body. Add olive oil, yogurt or honey to coffee grounds after your daily cup! More details here and here
    • Honey is a great humectant and bacteria-killer for your face. It's great for acne-prone skin! More details here
    • Yogurt is great for skin as well, especially when combined with honey. Instructions here


7. You are what you eat: Beauty comes from the inside out, so eating a healthy diet and staying hydrated are vital for the health of your nails, skin and hair. Eat as many fruits and veggies as you can, and remember that canned and frozen are just as healthy and much cheaper than fresh! Pick up a box of green tea bags from the dollar store to benefit from antioxidants and disease-fighting free radicals that will help clear your skin (read about more benefits here). Plus, you can use the tea bag on your face after you've brewed it! Make sure you're drinking enough water each day - staying hydrated helps keep your skin from flaking, especially during the winter! Make sure you're getting plenty of protein and calcium, which help your hair and nails grow stronger - dairy is a great source of both! And if your diet is lacking, try to take some vitamin supplements. You can find hair, skin + nails supplement mixes at the grocery store for less than $10!

8. Get every last drop out of your beauty products: You know that feeling when you're squeezing some empty plastic tube every which way, trying to get out the last drops of your expensive beauty products? You KNOW there's some left in there, but you can't get it out - so you probably just throw the product away. Well next time, don't! Just cut the container open so you can access the last bit of your product before throwing it away. There's usually more than you'd expect, so have a baggie on hand to hold the opened product so it doesn't dry out. This works best for plastic containers that are easy to cut open, especially tubes such as for moisturizer or spot treatment, but you can use it for basically any product that appears to be empty. As long as you can break open the packaging, you can make sure you get your money's worth!

More pictures at this blog entry!
9. Don't throw away broken eye shadows: Have a loose or crumbled eye shadow? Don't throw it away! Eye shadows are easy to press back into place using isopropyl alcohol (rubbing alcohol). The alcohol evaporates away from the eye shadow, leaving it perfectly in place! Just mix a few drops of alcohol with your eyeshadow powder to make it easy to pour into a pan and set. This trick will actually work with any powder makeup, such as blush! Instructions here and here

10. Buy beauty products for cheaper: I get a lot of beauty products from HauteLook, where brands such as LORAC, Stila and Urban Decay sell makeup for insanely discounted prices, and there's almost always a good hair-care line. HauteLook is where I discovered 100% Pure, which is my all-time favorite beauty brand - but too expensive to afford full price! Bonus: refer friends to HauteLook for free purchase credits! Read more here. I also get a ton of beauty goodies from Amazon thanks to my free gift cards from Swagbucks.  Read more about Swagbucks in this entry - personally, I earn about $25 in Amazon Gift cards each and every month! Did you know that Sephora has an entire store on Amazon? That means that Amazon gift cards = Sephora gift cards - and they're FREE! It's like Christmas every day! You can also get high quality, cheap brushes from CVS - their Essence of Beauty line is great - and Target - their Sonia Kashuk line is pricier than CVS, but still high quality!

So there you have it! You can be broke and stay beautiful! Don't see your favorite cheap beauty tip posted? Let me know in the comments!

Want to know about new freebies, samples, deals and money-saving as soon as they happen? Follow The Broke Student's Guide on Facebook, Twitter and Tumblr.

Sunday, December 11, 2011

The Broke Student Finals Survival Strategy: Make-Your-Own Starbucks Part 1

Ah, coffee. A must-have for most college students, especially during the hellish weeks that we all know as "finals" (or "f*** I never learned sh**" if you're into that). You'd be hard-pressed to find a student in the library this week without a cup of coffee clutched in their trembling little hand. But at what cost?? No, I'm not talking about the expense of your sanity, health, or sleep-deprived car wrecks; I'm talking about how expensive Starbucks coffee is. Oh my god, IT IS SO EXPENSIVE. How expensive, exactly? Well say you're a casual Starbucks drinker. You only buy a coffee 4 days out of the week when you have class, and you just get a tall of whatever holiday drinks happen to be out, so it's only about $3.60. Sadly, that $14.40/week habit adds up to $57.60 per month, $230.40 a semester and $460.80 in a school year! And that's not counting the times when you got a Grande or some extra syrup or went to Starbucks on the weekends. It adds up, guys! But don't worry - I'm about to save you that $460, and it will only cost you maybe $30 MAX if you really go all out.

My in-home coffee shop, complete with rainbow-organized tea bags!
I resisted coffee for a long, long time. I was a green tea girl, and I drank those big canned energy drinks when I needed a boost. But then one summer I lived in an apartment that had a 100% free unlimited fresh-brew, fresh-roasted coffee machine filled with fresh Starbucks coffee beans. You just pressed a button, and the beans were ground and brewed before your eyes. It was amazing (and made paying rent totally worth it). I became a daily coffee drinker that summer, and when I moved back onto campus, I use one of my Swagbucks Amazon gift cards to buy myself a cute little one-cup coffee machine that came with a travel mug! Since then I've built up quite a little coffee empire on my kitchen counter, which you can see in that picture there. The orange coffee machine, which is actually not currently used for anything aside from making my kitchen look adorable, was found at Goodwill. And that brings me to the point of Part 1: How-To: How To Make Your Own At-Home Coffee Shop.  (PS: this would make a neat gift idea for your favorite Starbucks-addicted broke student friend!)

How To Make Your Own At-Home Coffee Shop.: What You Will Need and Where to Get It


1. Coffee Machine I mean, duh. But have no fear! Not only are coffee makers cheap and easy to find and use, but you can have one in your dorm room! Yay! The best places to get a good, inexpensive coffee machine:

  • Thrift Stores like Goodwill and the Salvation Army sell small appliances and frequently have coffee machines. Expect to pay anywhere from $2-$7 for one.
  • Post and ad on your local Craigslist or your school's Online Classifieds asking if anyone has a cheap one to sell for around $5.
  • Ask for one for free on your local Freecycle board. To find your local Freecycle chapter, visit Freecycle.org.
  • Amazon.com has some nice little ones for around $10-$15. I really like the one-cup machines that come with travel mugs so you can brew it and then take it right to class with you. There are some good cheap ones listed below. (Remember: you can use your Swagbucks points to redeem for Amazon gift cards!)
2. A Mug After you've got yourself a coffee maker, the next thing you need is something to put that coffee in once you brew it. If you bought a machine that comes with a travel mug, skip this step. If not, head to your nearest thrift store - they usually have some good mugs, and most of them end up being unintentionally hilarious (#1 Grandma? Hot Tasty Butts? ...that second one is a restaurant in MO, I didn't just make it up.) Or ask on Freecycle, most people have lots of mugs lying around. If you want a convenient little travel mug to take with you to class, hit up Amazon. DON'T go to a store, they usually tend to run about $15-$20 at a Target or Starbucks. Here are some fairly cheap travel mugs:

3. Coffee Again, kind of a no-brainer, but this one is a bit trickier. When I first started out brewing my own coffee, I went straight to the Dollar Tree and bought some coffee from them. As you can imagine, it was sub-par quality. So don't feel bad if you opt for the $8.99/lb coffee beans from Kroger or your local health food store - it's probably worth it, and it's way cheaper than Starbucks anyway. Grocery and health food stores typically have fresh beans and a grinder right there in the aisle. Dunkin' Donuts also has decent ground coffee, and of course there's always instant coffee like Folger's if you're not picky.

4. Creamer and Syrup Now that you've got the basics, it's time to have some fun! The flavored creamers and syrups you get are what will transform your at-home coffee into a Starbucks-esque dream come true. (You can also always stick with plain milk, though!) First you need some tasty creamer. Here's where to pick that up:

You can get creamers like this one at
the grocery store!
  • The Dollar Tree occasionally has International Delight creamer bottles, in flavors like Hazelnut and French Vanilla. Those are the same creamers in the little cups at gas stations and whatnot, and they are delicious!
  • Grocery Stores usually have tons of different creamers in both powder and liquid form. They'll also have fun flavors like Peppermint Mocha and Creme Brulee. Kroger in particular has a great selection of creamers. Pick out some fun flavors!
  • Gas Stations You know those little creamer cups I mentioned earlier at the gas station? Well as long as there isn't a limit to the amount you're allowed to take, why don't you go in there and buy a coffee and then, ahem, grab a couple of extra creamers to take along for the ride? I wouldn't condone this if I hadn't tried it myself many times in full view of the gas station attendants and confirmed that it is definitely NOT stealing - they've never said anything to me about it, and if there's a limit on the creamer you can take there is usually a sign. That said, don't steal.
Syrups are the other add-in that take your coffee from basic to baller. They can be expensive and difficult to find, though - I found mine (pictured above) at The Dollar Tree for $1 each! They will also have them at Grocery Stores, though they tend to be a bit on the pricey side. But if you always get a splash of Sugar-Free Hazlenut in your Starbucks, it might be worth the cost.

5. Sweeteners, Extra Goodies The last part of your DIY at-home coffee shop is the sweeteners and other extra goodies! You know what kind of sweetener you like best, so I suggest stocking up on it. Again, as long as it's free and unlimited, go ahead and grab some sweetener packets at a fast food place or gas station - just make sure it's REALLY free and unlimited, and buy something while you're there so you're not being a total dick. As for Extra Goodies, here's where you can have a bit of fun and get creative (or don't, because this stuff is totally optional.) How about Whipped Cream or Cocoa Powder to top off your drinks? Or Sprinkles? Or Cinnamon, Vanilla Extract, or Chocolate Syrup? In some of the recipes I'll be mentioning in my next post, we'll be using goodies like Hot Chocolate, Peppermint Extract (or candy canes, or peppermint candies) Eggnogg and Canned Pumpkin. So get creative in your grocery aisle! Like I said at the start of this article, even if you spend $30 on your at-home coffee shop today, you're still saving yourself from a $460/school year habit. Or to put it more simply, if you make your own drinks at home instead of going to Starbucks for 2 weeks, your at-home coffee shop will have paid for itself.


Of course, some of you are probably making a face right now and rolling your eyes and thinking "oh my god, this is way more work than just actually going to Starbucks, $460 be damned!" And, yea, you're right. So for those of you who just prefer the convenience of having someone else make your own coffee, I've got you  covered too! Here are your alternatives:

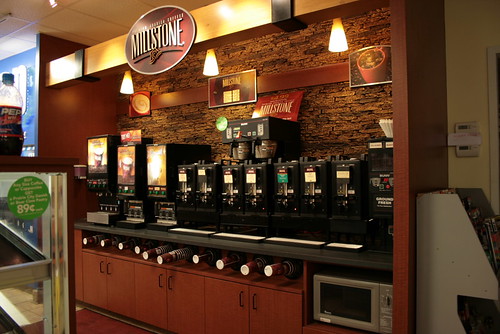
Circle K has tons of yummy coffee options for only $.99!
  1. Buy Your Coffee Somewhere Cheaper Just hear me out on this one: there ARE cheaper places to buy coffee than Starbucks, and they DO taste just as good. Some of the best and cheapest coffee drinks I've had come from gas stations, especially Circle K and QuickTrip.  Both of these gas stations serve 16oz flavored cappuccinos for $.99! You can make your own coffee drink by mixing and matching yummy stuff like French Vanilla Cappuchino or Pumpkin Spice Latte or plain old flavored coffee. Not only is it cheaper, but you get MORE coffee, and it tastes DELICIOUS. (Plus: free unlimited flavored creamer!) If you buy one of these coffees 4x a week for a school year, you'll spend only $128 - practically 1/4 of what you'd spend going to Starbucks!
  2. Use Gift Cards Sometimes it's just gotta be Starbucks. I get it. So for those times, why not use a free Gift Card? Where would you get those gift cards for free, you ask? Why, that site I keep talking about getting Amazon gift cards - you can ALSO redeem your points for Starbucks gift cards! I'm talking about  Swagbucks, of course. They offer $5-$100 gift cards to Starbucks. They are slightly more expensive than the Amazon gift cards, but the average daily Swagbucker can usually make about 2250 points in a month - enough for about $15 in Starbucks gift cards. Not bad, eh? At least that's one week's worth of Starbucks paid for each month! That adds up to a savings of $120/school year. To learn more about earning Swagbucks, read this entry. 
Stay tuned for Part 2: Make-Your-Own Starbucks Drink Recipes!!

Want to know about new freebies, samples, deals and money-saving as soon as they happen? Follow The Broke Student's Guide on Facebook, Twitter and Tumblr.

Monday, May 9, 2011

Save $205 this month: learn to penny-pinch!

We've all heard the cliches - "A penny saved is a penny earned," "Every little bit adds up" etc etc. But is it really true? Can pinching pennies save you enough money to be worth your time? The answer, as you probably already guessed, is YES. But what kinds of things can you do to pinch those pennies, and how much is it actually worth? Here's a breakdown of some easy, quick ways to save some cash, and how much it could save you per month.

-Eat at home at least 6 nights a week, even if
you're just eating a frozen dinner. If you ate at home rather than eating out 6 nights a week for a month you'd save about $100.

-Put all of your spare change into a jar as soon as you get home every day. If you saved all of your spare change in one spot rather than just leaving it in your pockets/purse/on the floor/in your car, you'd save about $10 a month.

-Learn to cook something that you eat frequently (for example, if you eat a Sausage Biscuit every morning for breakfast, buy sausages and biscuits at the grocery store and make your own! Savings per week? $5.80!) If you replaced something you eat frequently with a home-made version, you'd save about $25 a month.

-Collect condiments and sugar/creamer packets from coffee shops and cafeterias so you don't have to buy entire bottles of ketchup or Splenda. If you stopped buying condiments, sugar and creamer, you'd save $10 a month.

-Collect napkins from fast food resteraunts, cafeterias and coffee shops, and use them instead of paper towels or tissues. If you stopped buying paper towels and tissues, you'd save $6 a month.

-Use plastic bags from the grocery store as trash bags. They're free, and that totally counts as recycling. If you stopped buying trash bags, you'd save $3 a month.

-Apply foundation and concealer with clean fingers, not makeup sponges. Sponges absorb most of the makeup rather than applying it on your skin, AND grow bacteria, needing to be replaced every week. What a waste! If you stopped buying makeup sponges and didn't need to buy makeup as often you'd save about $5 a month..

-Print things out at the library or in a computer lab, instead of on your own printer. The money you save on ink and paper will be about $10 a month.

-Pick up condoms at your campus' health center or local Planned Parenthood for free. If you used free condoms instead of buying them, you'd save about $6/month.

-Take the bus, carpool, bike or walk instead of driving your car. If you avoided using your car as much as possible, you could save about $30 on gas each month.

Total Monthly Savings: $205
Total Annual Savings: $2460

So you see, it's easy to save big by doing very little! Do you have any additional penny-pinching tips not mentioned here? Let me know in the comments or on my facebook wall!
Related Posts Plugin for WordPress, Blogger...