Friday, February 24, 2012

Broke and Beautiful: Tips and Tricks to Save Money on your Beauty Routine


Being broke doesn't mean you have to LOOK broke. As college students, it's a requirement to look put-together for career and networking events such as career fairs or even class projects. This can be tricky when you're on a tight budget, but it's not impossible! Here are some tips and tricks to save money on your everyday beauty routine. And here are some possibilities to save on brand name beauty products through these coupons for Macys.


1. DIY Tinted Moisturizer: Tinted moisturizer - a lightweight, sometimes sheer foundation that moisturizes your skin - has become a hot product, especially for the summertime. It's my go-to product for those days when I'm super bored/lazy/tired/have class in 5 minutes/want to apply foundation and moisturizer at the same time (so basically always). But tinted moisturizers are pricey, often WAY more expensive than either moisturizer or foundation. Chances are, you already have a foundation in your color and a moisturizer that you like, so here's how to make your own tinted moisturizer: combine them. Yup, it's that easy. You can put them in their own little container or just mix a drop of each on the back of your hand before you apply it to your face. Voila! Tinted moisturizer.
  • Even Better: Make your tinted moisturizer multi-task even more by adding other products to it such as self-tanner or tea tea oil (for acne - but don't add regular acne cream because it tends to flake). Anything you put underneath your makeup can probably be added to your tinted moisturizer to save time and keep you from buying multi-tasking products that you can make yourself!

2. Apply your makeup right: Using the right applicators to apply your makeup can make the difference between smooth, blended makeup and a streaky mess. It can also make a difference in your wallet - using a sponge to apply makeup sucks up the majority of your product, leaving most of it in the sponge instead of on your face - aka wasting your money! Sponges also tend to grow bacteria and must be thrown out frequently, meaning you have to purchase more sponges, which adds up. Instead, use clean, dry fingers to apply foundation, moisturizer, and concealer. Your hands (which are free) won't absorb as much product as a sponge, and your body's natural warmth will help the product sink into your skin.
  • Even better: If you use makeup brushes to apply your makeup, make sure you wash them frequently with cold water and soap (or shampoo, or face wash, etc). Washing them more frequently helps the brushes work better, avoids dirt and oil buildup which leads to acne, and ensures no bacteria growth. Use cold water because hot water loosens the glue which holds the brush together, causing your brush to fall apart over time.
3. Get sparkly white teeth: Teeth whitening can cost an arm and a leg, but it doesn't have to! The primary ingredient in every whitener - be it at your dentist or the pharmacy - is hydrogen peroxide. The secondary ingredient is typically baking soda. You probably know what I'm about to say, but here it is anyway: you can make your own teeth whitening paste by combining hydrogen peroxide and baking soda. These two magical products are available for around $1 at your local grocery store, pharmacy or dollar store! Just combine them and use it in addition to or instead of your normal toothpaste for super white teeth. (Note: it tastes gross, so you might want to add some flavoring or mix it with your normal yummy toothpaste or mouthwash.)

  • Even Better: You can use hydrogen peroxide as a whitening mouthwash. It won't give you that tingly feeling or make your breath minty fresh, but it WILL whiten your teeth. You can also use it to help clean out your ears and sanitize cuts. You can use baking soda to wash your hair and your house! Who knew such cheap products were so amazing?

4. When it comes to your face, less is more: For those of us with "problem" skin (oily, acne prone, flaky, etc) our tendency is to buy tons of "miracle" products to try to fix our face. We buy special cleanser, moisturizer, treatment cream, toner, and more for our face and slather it all on there. If it doesn't work, we buy different products and try again. The result is an endless cycle of expensive products that aren't helping anything and are, more likely, creating the very problem we're trying to fix. Let me explain. If you happen to have acne-prone or oily skin (like me) you might be drawn to products that promise to soak up all the oil in your face, dry it out, treat all of the acne with strong acids or peroxides, and leave us with clean, clear skin. Your skin might feel tight after you wash it, but end up an oil slick within hours, resulting in zits and shininess. So maybe you go wash your face again to get rid of all that oil - only to find yourself repeating the cycle over and over. This is because your skin actually NEEDS that oil! It needs to be hydrated so that it can move and stretch and do all of the things skin does. Without oil, things would be painful and uncomfortable. Over-drying our skin causes it to overcompensate by producing MORE oil than we might actually need, creating that oily mess that can lead to acne. If you have oily skin that gets dry and flaky in the winter, this applies to you most of all. Stop drying out your face! Stop stressing out your skin with too many harsh products! Just let it do its thing! 

         Now, I don't want you to have dirty skin - but you can cleanse and treat your skin WITHOUT the harsh chemical cleansers. Try using baby wipes instead. Baby wipes are the cheap version of makeup-removing towelettes, and they also tend to be infused with aloe, vitamin E, and other nutritious stuff for your face. They are designed not to irritate sensitive skin so they don't stress and upset your skin (especially the "unscented" or "sensitive skin" types.) And they do just as good of a job at cleaning off the day's makeup and dirt as your harsh, chemically cleanser would, without stripping your skin of its natural oils and leading to too much oil production. If you're skeptical, try this experiment for a week: use baby wipes in place of your cleanser.  Moisturize afterwards, and spot treat any acne with your usual spot treatment (DON'T slather it all over your face, though!) Check if there's a difference in your skin at the end of the week - most likely, it's a little bit less dry and flaky, a little bit less oily, and a little bit more clear.  Keep using those baby wipes and you'll find that you never need to buy an expensive cleanser again. Just make sure you moisturize and use those baby wipes every day, and you've have clear, beautiful, unstressed skin at a fraction of the cost in no time. (PS: if you  also use the DIY skincare treatments below, your skin and wallet will thank you!)

5. Get the most out of your nail polish: Have you ever opened up your nail polish collection only to find that your favorite colors are clumpy, flaky, or just plain dried out? Save yourself the cost of new nail polish by saving those polishes with this nifty trick: just add nail polish remover! I know it sounds strange, but adding a few drops of nail polish remover as needed will make out your polish and make it last much, much longer. If it's an older polish, you might have to do this before EVERY application - but at least you'll be able to finish out the bottle instead of throwing it away only half empty! Go on, try it - what do you have to lose? You'd just be throwing that polish out anyway!

6. Natural (and affordable) DIY beauty solutions: You can give yourself a spa day just using stuff you already have in your house! If you don't have these ingredients, they aren't very expensive and can be purchased at any grocery store.

  • For Your Skin
    • Apple Cider Vinegar makes a great bacteria-killing toner for acne-prone skin. More details here
    • Witch Hazel makes another excellent toner! Apply it to a cotton ball to cleanse the dirt from your pores. More details here
    • Green Tea makes yet another great toner, especially for oily skin. Read some reviews here
    • 1/2 tsp. of sea salt + 2 egg yolks + 1/2 cup of yogurt = Toning Mask! Add all ingredients, apply to face and let dry. This is an exfoliating, tightening and soothing face mask.
    • Sea Salt + Olive Oil = Exfoliating Scrub! Add some vanilla or yummy smelling scent to overpower the smell of the olive oil. The Dollar Tree has some good smelling oils in their candle aisle. Use this scrub on hands, feet, and anywhere your skin needs exfoliating moisture.
    • Aspirin + Honey = Exfoliating, moisturizing face mask. Great for acne-prone skin. Instructions Here
    • Coffee Grounds make an antioxidant-rich, de-puffing exfoliant for face and body. Add olive oil, yogurt or honey to coffee grounds after your daily cup! More details here and here
    • Honey is a great humectant and bacteria-killer for your face. It's great for acne-prone skin! More details here
    • Yogurt is great for skin as well, especially when combined with honey. Instructions here


7. You are what you eat: Beauty comes from the inside out, so eating a healthy diet and staying hydrated are vital for the health of your nails, skin and hair. Eat as many fruits and veggies as you can, and remember that canned and frozen are just as healthy and much cheaper than fresh! Pick up a box of green tea bags from the dollar store to benefit from antioxidants and disease-fighting free radicals that will help clear your skin (read about more benefits here). Plus, you can use the tea bag on your face after you've brewed it! Make sure you're drinking enough water each day - staying hydrated helps keep your skin from flaking, especially during the winter! Make sure you're getting plenty of protein and calcium, which help your hair and nails grow stronger - dairy is a great source of both! And if your diet is lacking, try to take some vitamin supplements. You can find hair, skin + nails supplement mixes at the grocery store for less than $10!

8. Get every last drop out of your beauty products: You know that feeling when you're squeezing some empty plastic tube every which way, trying to get out the last drops of your expensive beauty products? You KNOW there's some left in there, but you can't get it out - so you probably just throw the product away. Well next time, don't! Just cut the container open so you can access the last bit of your product before throwing it away. There's usually more than you'd expect, so have a baggie on hand to hold the opened product so it doesn't dry out. This works best for plastic containers that are easy to cut open, especially tubes such as for moisturizer or spot treatment, but you can use it for basically any product that appears to be empty. As long as you can break open the packaging, you can make sure you get your money's worth!

More pictures at this blog entry!
9. Don't throw away broken eye shadows: Have a loose or crumbled eye shadow? Don't throw it away! Eye shadows are easy to press back into place using isopropyl alcohol (rubbing alcohol). The alcohol evaporates away from the eye shadow, leaving it perfectly in place! Just mix a few drops of alcohol with your eyeshadow powder to make it easy to pour into a pan and set. This trick will actually work with any powder makeup, such as blush! Instructions here and here

10. Buy beauty products for cheaper: I get a lot of beauty products from HauteLook, where brands such as LORAC, Stila and Urban Decay sell makeup for insanely discounted prices, and there's almost always a good hair-care line. HauteLook is where I discovered 100% Pure, which is my all-time favorite beauty brand - but too expensive to afford full price! Bonus: refer friends to HauteLook for free purchase credits! Read more here. I also get a ton of beauty goodies from Amazon thanks to my free gift cards from Swagbucks.  Read more about Swagbucks in this entry - personally, I earn about $25 in Amazon Gift cards each and every month! Did you know that Sephora has an entire store on Amazon? That means that Amazon gift cards = Sephora gift cards - and they're FREE! It's like Christmas every day! You can also get high quality, cheap brushes from CVS - their Essence of Beauty line is great - and Target - their Sonia Kashuk line is pricier than CVS, but still high quality!

So there you have it! You can be broke and stay beautiful! Don't see your favorite cheap beauty tip posted? Let me know in the comments!

Want to know about new freebies, samples, deals and money-saving as soon as they happen? Follow The Broke Student's Guide on Facebook, Twitter and Tumblr.

Wednesday, February 8, 2012

The Best (Free) Apps for College Students

Many of us, self included, received smart phones/tablets/iPods what have you this year. After the initial joy of joining the 21st century wears off, one question remains: what apps should I download? Well, I'm here to answer that age-old question. And if you don't have yourself a fancy piece of touch screen machinery yet, no worries - I'm also going to recommend a few apps for Google Chrome! In fact, I'll start with that first. (Note: if you're not using Google Chrome as your browser, please go download it. Mozilla is fine too - just as long as you're not still using Internet Explorer. Please tell me you're not.)

The Best Chrome Apps for College Students
First thing: to get to the Chrome app store, click here in your Chrome browser.

1. StayFocusd This is the app that will change your life if you, like me, happen to sit around on the internet for hours and hours and suddenly realize it's 2am and you didn't get anything done. This app is for us. Using StayFocusd you can limit the amount of time you spend on time-wasting websites. You set the time per day (such as 40 minutes) and you set the websites you want to limit. (Example: Facebook, Tumblr, Twitter etc.) You can also set "allowed" sites and even set a window of time for unlimited browsing (mine is set to 2 hours at night and weekends). And possibly the most useful of all: you can "Go Nuclear," which means ALL websites except, if you want, those on your "Allowed" list (Blackboard, Oncourse, etc) are completely blocked for as long as you want them to be. It is a LIFE SAVER when you need help focusing, or when Wikipedia articles on celebrities are more exciting than the essay you need to finish writing. Download it here.

2. Evernote This is basically like an electronic notebook where you can paste and clip anything you want to remember later. Write notes, add lists, pictures, videos, whatever you want - and you can sync them to your phone or other devices, too! Download it here.

3. Remember the Milk This is a task-management app for those of us who DON'T regularly keep To-Do lists handy. Simply add a task to your list, prioritize it, and if you like, give it a time estimate or due dates. If it's really important, you can have the app send a reminder to you to complete the task by phone or email! A must-have organization and productivity app. Download it here.

4. Mint.com So this one is really less of an app and more of a bookmark, but if you haven't yet signed up for Mint.com - the BEST money management and budgeting tool ever - take this opportunity! To learn more about Mint, read this blog post. Download it here. 

The Best Smart Phone and Tablet Apps for College Students
Most of these apps will be available for iPhone, Android, iPad, Kindle Fire, etc, but make sure you check first (and don't kill me if it's not available for you!) I have an iPhone 3G, so these apps are all for sure available in the App store at the very least. Anyway, here are my recommendations.

1. Any app from your school! If your school has an app, download it! School apps can help you catch a bus on time, check your meal points, give you instant updates on campus closings or dangers, help you find buildings on campus or numbers to call if you need help, and more. Search for your school to see if you have an app available.


2. CampuSpecial An app created by http://www.campusspecial.com/. Many of you may already get the little coupon booklets from CampuSpecial containing awesome local deals around your campus. Well, imagine if you could get all of those coupons, deals and more, right on your phone, using a handy locator to find which ones are closest to you? It's pretty freakin' awesome. The app is free, search for CampuSpecial in the App store or Android Marketplace.

3. Mint.com Unfortunately, this app is only available for newer iPhones, so 3Gs can't use it. It is available for Androids as well as Kindles from the Amazon App store. Anyway, if you haven't gotten the message yet, Mint.com is the most amazing, super easy, incredibly awesome way to track your spending and budget your money. Even if you don't do anything more than just set it up to look at where you're spending your money, it's insanely helpful.   To learn more about Mint, read this blog post. (Note: even if you don't use Mint, at least download your bank's app to keep track of your spending so you never incur overdraft fees!)

4. Evernote Evernote is the best way to make notes for yourself on your phone. Unlike the regular "notepad" that comes with your phone or tablet., Evernote allows you to create notebooks or organize your notes and include photos, audio clips and more to your notes. If you're the kind of person who frequently finds themselves writing cryptic notes in your phone or taking photos to "Remember for later," this is the app for you.

5. Amazon Price Check, Google Shopper or Shop Saavy Both of these apps are price comparison apps. Google Shopper searches for prices in your local area - so if you're in, say, Target looking at some nail polish, you can scan it with Google Shopper and find out that CVS next door has it for cheaper. Price Check searches for prices on Amazon, which is good for things you might not need immediately but want to save money on. Shop Saavy will search for a scanned bar code both online and in local stores, and also has reviews available for the product you scan. Making sure you're getting the best price possible means saving money!

6. Shopkick So you know how I love paid-to sites like  Swagbucks where you get points to do super easy stuff and then can redeem those points for gift cards and other rewards? Well, Shopkick takes that idea to a whole new level. Shopkick gives you points you for going into stores and doing super easy stuff, and then you can redeem those for gift cards and other rewards. Let me repeat: GOING INTO STORES AND DOING SUPER EASY STUFF. For example, you'll get 50 "kicks" (points) by just walking into Best Buy, or Old Navy. Just WALKING IN! You can get more kicks for doing "scans", which just means finding a specific product and scanning its barcode. (Like a treasure hunt!) Yesterday, for example, there were 750 possible "kicks" for scanning items at Target. A $2 gift card is about 500 "kicks", so if you were going to Target to pick up some toothpaste or whatever anyway, you would've just gotten it for free and then some. In my experience, one trip to the mall can usually get me about 500 kicks, so this is a very easy to get rewarded for just walking around stores. If you want to save up your points for the rest of your life, you can get a cruise for a couple million "kicks" - I prefer to redeem my points for gift cards and do as little work as possible to earn them. I highly recommend this app- it's fun, easy, and gives you free money! What could be better?

Other Free Apps I Love: These might not be college-specific, but they are very useful:
- Pandora: better than listening to your playlists!
- AroundMe: For when you're wandering around and want to know where the nearest whatever is.
- HopStop: When you need to figure out how to get from A to B using public transportation!
- HauteLook: I'm just addicted to HauteLook, basically.
- Thrift Hunter and ThriftBuddy: I love thrift store shopping, especially in places I've never been. These apps help locate the thrift stores nearby.
- Shazam: For when you hear a really cool song and want to know what it is.
- Find My Car: Helpful in big parking lots, or for people who forget where they park their car every single time.
- Yelp: Need a review of a restaurant, salon, bar, etc at a moment's notice? Yelp has it covered.


Want to know about new freebies, samples, deals and money-saving as soon as they happen? Follow The Broke Student's Guide on Facebook, Twitter and Tumblr.

Monday, January 16, 2012

The most profitable tip I can ever possibly give you

Hello everyone! My apologies for the severe lack of posting over the Holiday. In addition to some much-needed extreme relaxation, I spent most of my time scrambling around doing interviews and attending events for my major.  I also actually managed to score the BEST freebie of my life to date over break: a FREE trip to New York City, 2 nights FREE in the Waldorf-Astoria hotel, and a FREE cocktail hour and dinner (valued at $750, apparently) with top industry leaders. Oh, and I'll be getting a FREE check for $5,000.  Total worth of freebie? $6,600. It inspired me to write this post, which details The most profitable tip I can ever possibly give you. (How Profitable? It could potentially pay for your entire tuition.)

 So how'd I do it? I entered and won a Merit-Based Scholarship. There are tons of them out there, and they're yours for the winning. If you can find 'em, enter 'em! Few people actually do, which means if you really take it seriously and put your heart into it, you've got a GREAT chance of winning. I only wish I'd known this before my last year in college! I've been discovering many amazing scholarships this year, and I want to share them with you, my readers, so that some of you can take advantage of these amazing opportunities. Not only do they  frequently pay in cash, but they look SO, SO, SO good on your resume. Having won a merit-based scholarship says to hiring managers that you have initiative and drive, seek out opportunities for yourself, take on extra projects and have a competitive edge. In short, the perfect hire!

So how do you go about finding these opportunities? In my case, I get a lot of emails sent out major-wide from my advisor, so I'm going to share a couple of those with you. I also hear them mentioned in classes (write those down and ask the professor about them afterwards!) and, of course, if you search around online, you can find them easily.  Also look at public bulletin boards on campus: not only are they great for finding new activities to go to, but they frequently advertise scholarships.  Look for scholarships offered for anything you participate in on campus: your dorm may have one, your major probably has a few, and any clubs/activities you're involved in may offer some as well. Here are some major-based scholarships I've found to share with you all. Get working!


For All Universities


- Sign up for these sites: http://www.meritaid.com/, http://www.scholarships.com/, http://www.fastweb.com/ and use them to search for scholarships to apply for
- Google "Merit Based Scholarships [Your School's Name]" and you should get some good results

For Indiana University Students
Your department's page will have a section titled "Scholarships." Go there to view all available scholarships for your major.

THE 2012 HENRY A. BERN MEMORIAL ESSAY COMPETITION
PRIZE: $1,500
Deadline: Tuesday, May 15, 2012
ELIGIBILITY: Any current Indiana University Bloomington undergraduate student.
Details: Read More Here

Apparel Merchandising and Interior Design Scholarships
PRIZE: Varies by specific scholarship, deducted from your bursar bill next fall semester
Deadline: January 18th, 2012
ELIGIBILITY: Scholarships are open to Indiana University Bloomington students who are either majoring in Apparel Merchandising, Fashion Design, Interior Design, or are earning the Fashion Design Certificate. (Not seniors, though, apparently).
Details: Common Application and Details Here

IUAA Alumni Scholarships
PRIZE: Varies by specific scholarship
ELIGIBILITY: Depends per scholarship - some are based on location, some campus, some group affiliation, and more.
Details: Read More and View All Available Scholarships Here

Oh - and the scholarship I won? It was the Y.M.A Fashion Scholarship Fund. If your school is a participating member, and you know a thing or two about fashion (either design or the business/merchandising aspect), you can apply next fall!

So what are you waiting for? Go win some scholarships! 


Want to know about new freebies, samples, deals and money-saving as soon as they happen? Follow The Broke Student's Guide on Facebook, Twitter and Tumblr.

Tuesday, January 3, 2012

How-To: Get Free eBooks for the Kindle, Nook and more

So if you're one of the lucky folks who got a Kindle or Nook this holiday season, you were probably very excited (THEY'RE SO COOL) but may have been slightly less excited when you realized that putting actual books on the thing was going to be nearly as expensive as buying them at a book store. Boo. Well, have no fear! The Broke Student Guide is here to find you the best resources for getting free e-books and other content to put on your new shiny Kindle, Kindle Fire or Nook. (Or whatever other e-readers are out there.) If you're looking for some good deals on a Kindle, click here for coupons at Overstock.com.

First off, until January 9th, Amazon is offering a $10 Kindle Textbook Credit! Just click here to claim your credit. It will automatically credit to your Amazon account once you claim it and you can use it towards renting or buying e-textbooks for your Kindle. Which is cheaper, not to mention way less heavy and annoying, than lugging around regular textbooks!

Next: free eBook websites! It's like MegaDownload for your Kindle. (If you don't know about MegaDownload yet, well, now you do!) Here we go:

Free Book Spot: If you have a specific book in mind, you'll be able to use this site to search for it and see if it's available for free.

The Book Depository: This site has over 11,000 free eBook options to choose from.

Baen: This site offers free sci-fi and fantasy eBooks.

Pixel of Ink: This blog posts daily free and bargain eBooks, along with reviews about the books listed. Each book has a link for Kindle and Nook downloads.

Free Nook Book Summary: Like Pixel of Ink, this blog posts daily summaries of free books available for the Nook.

E-Pub Books: This site offers books in a format that can be read on ANY electronic book reader. The selection offered is copyright free/public domain works.

ManyBooks : This site mostly has classic books - remember that all copyright free books will always be free - and a huge variety of genres. Search by Author, Title, Genre, and more.

Project Gutenberg offers over 36,000 free ebooks to download to your PC, Kindle, Android, iOS or other portable device. Choose between ePub, Kindle, HTML and simple text formats.

SmashWords: This site offers eBooks from Independent publishers and authors. Find something new that no one else has read! They have a huge free selection to choose from.

Munseys: Offers tons and tons of fiction. Appears to have a particularly high amount of cheesy 1950s-1960s era fiction novels, a la pulp fiction.

Girl eBooks: Offers a large selection of out of copyright classics, focusing on female authors.

And last but not least: The Library! Yes, you can borrow eBooks for free from your local library! Hit up your local branch to take advantage. (While you're there, pick up some free movies and read a couple free magazines too. Aren't libraries great?)

PS: Did you know that you get a FREE month of Amazon Prime along with your Kindle Fire? That means tons of free movies and TV shows, free 2-day shipping, and more! But even without a new Kindle Fire you can get free Prime - if you haven't taken advantage of the free Student Prime membership deal, go get it now! You'll get 6 months of free Amazon Prime benefits.


Want to know about new freebies, samples, deals and money-saving as soon as they happen? Follow The Broke Student's Guide on Facebook, Twitter and Tumblr.

Thursday, December 22, 2011

Last Minute Gift Idea: Cake Mix Cookies! And, Free Downloadable Gift Labels

So I made a gift guide a few weeks ago, but I know most of us spent the past week or so running around like crazy trying not to succumb to the horrors of Finals Week. Now that it's over with, let's all breathe a big sigh of relief (PHEW!) and then try to scramble around and figure out what to give everyone for the holidays!

Picture of Retorte's Cake Mix Cookies
The easiest, most wonderfully delicious and inexpensive idea I've come across this year are Cake Mix Cookies. What are cake mix cookies? Well, exactly what they sound like - cookies made from cake mix! Except they don't bake like cake, they bake like delicious cookies, and then when they're done you don't have to decorate them. The reason I love these cookies and am making them in spades this year is because they are easy and cheap. A box of cake mix is typically around $1.00 - don't pay any more than that for it. Hit up your local dollar store or Wal Mart to snag a couple boxes. I highly recommend getting a Butter Yellow or Golden Butter mix, from any brand - it's MUCH better than regular old yellow cake, and it's the most adaptable mix out there. Duncan Hines, Pillsbury and Betty Crocker all have their own version of Butter cake mix. If you're a chocolate person, get some sort of chocolate mix, and if you're adventurous, try a Spice Cake mix or a Cherry Cake mix or Funfetti or whatever catches your fancy!

Here's what you need:
- 1 Box of cake mix (any kind)
- Eggs
- Oil or butter
- Water
- Chocolate chips, M&Ms, nuts, peanut butter chips, butterscotch chips, dried fruit, candy, ANYTHING you want to put in your cookies

Here's How to Do It:
Preheat your oven to 350°F. Dump your cake mix in a bowl. Add 1/4 cup water and 1/4 cup oil or butter (if you're using butter, that's half of a stick.) Add 1 egg if you want cookies that rise but don't spread much (they will be puffier and fluffy inside),  2 eggs if you want your cookies to spread and flatten out more (they will be slightly more crispy). Mix furiously. The dough will be sticky and tough, that's perfectly normal. Work those arm muscles, and pretend you're burning off some of the calories of the 92862768276 delicious cookies you're going to be eating later. Once your dough is all mixed together, add whatever mix-ins you want to add and mix again. Now that you're all mixed and ready to go, grease a cookie sheet and form little dough balls/clumps on the baking sheet, spaced about an inch or two apart to allow for spreading. Try to make them as roundish as possible, because especially if you only used 1 egg, they probably won't spread enough to become magically round on their own. Once your cookie sheet is all filled, pop those suckers in the oven for about 15 minutes or until the tops of the cookies have hardened and the bottoms are slightly browned. Wait for them to cool before eating one!

Here Are Some Interesting Cookie Ideas:
Chocolate Cake Mix Sandwich Cookies from Annie's Eats
- Peppermint Holiday Cookies! Stick an Andes mint inside each cookie, or crumble up some candy canes to use along with chocolate chips.
- Cookie Sandwiches! Ice your cookies and stack them on top of one another. Roll the edges in holiday colored sprinkles.
- Ice Cream Cookie Sandwiches! Sandwich ice cream between your flattened, cooled cookies. Roll the edges in holiday colored sprinkles and freeze before wrapping.
- Pinwheel Cookies! Make 1 batch of "white" dough and one of chocolate or red velvet dough. Using this technique,  roll out your dough onto a big rectangle of wax paper and place in fridge until firm. Stack your doughs one on top of the other - place any fillings you want rolled inside on top - and roll carefully into a log. Wrap log in wax paper and roll on surface to achieve optimal round log shaping, and firm in fridge again if necessary. When log is well shaped and firm, slice cookies. A knife might flatten your log so you may want to use unflavored dental floss instead. Voila!
- Cherry Chocolate Chip Cookies! Add dried cherries and chocolate chips to your cookies, and possibly walnuts too.
- Chocolate Caramel Cookies! Get some chocolate caremel candy such as Rolos or Milk Duds and roll one inside of each cookie to create a melty chocolate caramel center when cookies are baked.

Package your cookies by putting them in a cookie tin from the Dollar Tree, or sticking them in plastic sandwich baggies and tying those up with ribbon. Gifts for everyone!!

Also, for those of you who ventured down the homemade alcohol route I discussed in my gift giving guide, I've made some labels for my gifts that I want to share with you all to download and use on yours! I created these in Adobe Illustrator, but they are all converted to plain .JPGs that you can color in yourself. The Skittles basic logo is easily customization just by using the "Paint" fill bucket tool in any photo editing program (heck, even MS paint will work). I added the flavor names for my labels and I've included a .zip file of all of those labels, which are for the "Blenders" Skittles. The Apple Pie Moonshine label is pretty much ready to go, you can fill in the background with a color if you want and then just slap it on your mason jars! Note: the images are very large, so make sure to measure your containers and then scale the labels down to the correct size.

To Download: Click to open full-sized in a new window, right-click and "Save As."
To Download these labels as a .zip compressed set of files: Click Here
To Download: Click to open full-sized in a new window, right-click and "Save As."

Enjoy and have a wonderful holiday break!
- The Broke Student Guide

Want to know about new freebies, samples, deals and money-saving as soon as they happen? Follow The Broke Student's Guide on Facebook, Twitter and Tumblr.

Sunday, December 11, 2011

The Broke Student Finals Survival Strategy: Make-Your-Own Starbucks Part 1

Ah, coffee. A must-have for most college students, especially during the hellish weeks that we all know as "finals" (or "f*** I never learned sh**" if you're into that). You'd be hard-pressed to find a student in the library this week without a cup of coffee clutched in their trembling little hand. But at what cost?? No, I'm not talking about the expense of your sanity, health, or sleep-deprived car wrecks; I'm talking about how expensive Starbucks coffee is. Oh my god, IT IS SO EXPENSIVE. How expensive, exactly? Well say you're a casual Starbucks drinker. You only buy a coffee 4 days out of the week when you have class, and you just get a tall of whatever holiday drinks happen to be out, so it's only about $3.60. Sadly, that $14.40/week habit adds up to $57.60 per month, $230.40 a semester and $460.80 in a school year! And that's not counting the times when you got a Grande or some extra syrup or went to Starbucks on the weekends. It adds up, guys! But don't worry - I'm about to save you that $460, and it will only cost you maybe $30 MAX if you really go all out.

My in-home coffee shop, complete with rainbow-organized tea bags!
I resisted coffee for a long, long time. I was a green tea girl, and I drank those big canned energy drinks when I needed a boost. But then one summer I lived in an apartment that had a 100% free unlimited fresh-brew, fresh-roasted coffee machine filled with fresh Starbucks coffee beans. You just pressed a button, and the beans were ground and brewed before your eyes. It was amazing (and made paying rent totally worth it). I became a daily coffee drinker that summer, and when I moved back onto campus, I use one of my Swagbucks Amazon gift cards to buy myself a cute little one-cup coffee machine that came with a travel mug! Since then I've built up quite a little coffee empire on my kitchen counter, which you can see in that picture there. The orange coffee machine, which is actually not currently used for anything aside from making my kitchen look adorable, was found at Goodwill. And that brings me to the point of Part 1: How-To: How To Make Your Own At-Home Coffee Shop.  (PS: this would make a neat gift idea for your favorite Starbucks-addicted broke student friend!)

How To Make Your Own At-Home Coffee Shop.: What You Will Need and Where to Get It


1. Coffee Machine I mean, duh. But have no fear! Not only are coffee makers cheap and easy to find and use, but you can have one in your dorm room! Yay! The best places to get a good, inexpensive coffee machine:

  • Thrift Stores like Goodwill and the Salvation Army sell small appliances and frequently have coffee machines. Expect to pay anywhere from $2-$7 for one.
  • Post and ad on your local Craigslist or your school's Online Classifieds asking if anyone has a cheap one to sell for around $5.
  • Ask for one for free on your local Freecycle board. To find your local Freecycle chapter, visit Freecycle.org.
  • Amazon.com has some nice little ones for around $10-$15. I really like the one-cup machines that come with travel mugs so you can brew it and then take it right to class with you. There are some good cheap ones listed below. (Remember: you can use your Swagbucks points to redeem for Amazon gift cards!)
2. A Mug After you've got yourself a coffee maker, the next thing you need is something to put that coffee in once you brew it. If you bought a machine that comes with a travel mug, skip this step. If not, head to your nearest thrift store - they usually have some good mugs, and most of them end up being unintentionally hilarious (#1 Grandma? Hot Tasty Butts? ...that second one is a restaurant in MO, I didn't just make it up.) Or ask on Freecycle, most people have lots of mugs lying around. If you want a convenient little travel mug to take with you to class, hit up Amazon. DON'T go to a store, they usually tend to run about $15-$20 at a Target or Starbucks. Here are some fairly cheap travel mugs:

3. Coffee Again, kind of a no-brainer, but this one is a bit trickier. When I first started out brewing my own coffee, I went straight to the Dollar Tree and bought some coffee from them. As you can imagine, it was sub-par quality. So don't feel bad if you opt for the $8.99/lb coffee beans from Kroger or your local health food store - it's probably worth it, and it's way cheaper than Starbucks anyway. Grocery and health food stores typically have fresh beans and a grinder right there in the aisle. Dunkin' Donuts also has decent ground coffee, and of course there's always instant coffee like Folger's if you're not picky.

4. Creamer and Syrup Now that you've got the basics, it's time to have some fun! The flavored creamers and syrups you get are what will transform your at-home coffee into a Starbucks-esque dream come true. (You can also always stick with plain milk, though!) First you need some tasty creamer. Here's where to pick that up:

You can get creamers like this one at
the grocery store!
  • The Dollar Tree occasionally has International Delight creamer bottles, in flavors like Hazelnut and French Vanilla. Those are the same creamers in the little cups at gas stations and whatnot, and they are delicious!
  • Grocery Stores usually have tons of different creamers in both powder and liquid form. They'll also have fun flavors like Peppermint Mocha and Creme Brulee. Kroger in particular has a great selection of creamers. Pick out some fun flavors!
  • Gas Stations You know those little creamer cups I mentioned earlier at the gas station? Well as long as there isn't a limit to the amount you're allowed to take, why don't you go in there and buy a coffee and then, ahem, grab a couple of extra creamers to take along for the ride? I wouldn't condone this if I hadn't tried it myself many times in full view of the gas station attendants and confirmed that it is definitely NOT stealing - they've never said anything to me about it, and if there's a limit on the creamer you can take there is usually a sign. That said, don't steal.
Syrups are the other add-in that take your coffee from basic to baller. They can be expensive and difficult to find, though - I found mine (pictured above) at The Dollar Tree for $1 each! They will also have them at Grocery Stores, though they tend to be a bit on the pricey side. But if you always get a splash of Sugar-Free Hazlenut in your Starbucks, it might be worth the cost.

5. Sweeteners, Extra Goodies The last part of your DIY at-home coffee shop is the sweeteners and other extra goodies! You know what kind of sweetener you like best, so I suggest stocking up on it. Again, as long as it's free and unlimited, go ahead and grab some sweetener packets at a fast food place or gas station - just make sure it's REALLY free and unlimited, and buy something while you're there so you're not being a total dick. As for Extra Goodies, here's where you can have a bit of fun and get creative (or don't, because this stuff is totally optional.) How about Whipped Cream or Cocoa Powder to top off your drinks? Or Sprinkles? Or Cinnamon, Vanilla Extract, or Chocolate Syrup? In some of the recipes I'll be mentioning in my next post, we'll be using goodies like Hot Chocolate, Peppermint Extract (or candy canes, or peppermint candies) Eggnogg and Canned Pumpkin. So get creative in your grocery aisle! Like I said at the start of this article, even if you spend $30 on your at-home coffee shop today, you're still saving yourself from a $460/school year habit. Or to put it more simply, if you make your own drinks at home instead of going to Starbucks for 2 weeks, your at-home coffee shop will have paid for itself.


Of course, some of you are probably making a face right now and rolling your eyes and thinking "oh my god, this is way more work than just actually going to Starbucks, $460 be damned!" And, yea, you're right. So for those of you who just prefer the convenience of having someone else make your own coffee, I've got you  covered too! Here are your alternatives:

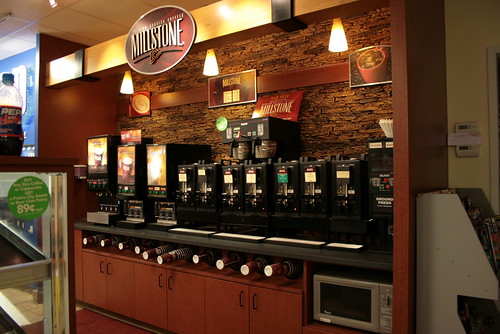
Circle K has tons of yummy coffee options for only $.99!
  1. Buy Your Coffee Somewhere Cheaper Just hear me out on this one: there ARE cheaper places to buy coffee than Starbucks, and they DO taste just as good. Some of the best and cheapest coffee drinks I've had come from gas stations, especially Circle K and QuickTrip.  Both of these gas stations serve 16oz flavored cappuccinos for $.99! You can make your own coffee drink by mixing and matching yummy stuff like French Vanilla Cappuchino or Pumpkin Spice Latte or plain old flavored coffee. Not only is it cheaper, but you get MORE coffee, and it tastes DELICIOUS. (Plus: free unlimited flavored creamer!) If you buy one of these coffees 4x a week for a school year, you'll spend only $128 - practically 1/4 of what you'd spend going to Starbucks!
  2. Use Gift Cards Sometimes it's just gotta be Starbucks. I get it. So for those times, why not use a free Gift Card? Where would you get those gift cards for free, you ask? Why, that site I keep talking about getting Amazon gift cards - you can ALSO redeem your points for Starbucks gift cards! I'm talking about  Swagbucks, of course. They offer $5-$100 gift cards to Starbucks. They are slightly more expensive than the Amazon gift cards, but the average daily Swagbucker can usually make about 2250 points in a month - enough for about $15 in Starbucks gift cards. Not bad, eh? At least that's one week's worth of Starbucks paid for each month! That adds up to a savings of $120/school year. To learn more about earning Swagbucks, read this entry. 
Stay tuned for Part 2: Make-Your-Own Starbucks Drink Recipes!!

Want to know about new freebies, samples, deals and money-saving as soon as they happen? Follow The Broke Student's Guide on Facebook, Twitter and Tumblr.

Saturday, November 19, 2011

The Broke Student Gift-Giving Guide

Holiday Gift Wrap Ideas make your cheap gifts WAY more classy.
The Holiday season is pretty much officially here (I mean, I don't think there really is an "official" arrival time, but it seems to me that it's pretty much happening, you know?  I mean, Starbucks is serving Holiday drinks now - buy one get one free, even!)! One of my favorite things about the Holiday season - aside from two weeks or so off from school -is giving my loved ones the perfect Christmas/Hanukkah/Whatever present, and with no income to speak of, that gets difficult. The following will be your How-To Guide for being able to afford this year's presents, so you can avoid that disappointed look when you  give your best friend yet another knitted scarf (or is that just my friends?). I present to you (GET IT? LOL) the Broke Student Gift-Giving Guide! 

More cheap, creative Gift Wrap Ideas!
1.  Before we begin, go and enter the Broke Student Giveaway, because you can buy lots of gifts with a $25 Gift Certificate to BuyGreen.com! Now, let's begin. The best way to give people quality gifts is, of course, to actually spend money on them. Which is where things get tricky, since of course, we don't have any money. If we did we wouldn't be reading this blog/entry. Have no fear! The Holiday season is the best time to cash in on all the hard work you've been putting into those Paid-To sites you signed up with months ago when I first wrote about them. (Right?!?!?! No? Ok, go sign up now, and hurry.) This month, I've cashed in a $45 check from InboxDollars.com, $75 in gift cards from Swagbucks.com, and a $50 Amazon gift card from MyPoints.com. For those of us who can't do math in our heads, that's a total of $170 that I'll have to spend on gifts this year! (Of course, after I buy my boyfriend all the video games he wants, that leaves about -$10 for everyone else. Which is why this isn't the only number in this list. Moving on.)

Wrapping your gifts in newsprint gives a vintage vibe.
2. Remember that entry I wrote about Mystery Shopping? If not, go read it. This month alone I've earned $114 from Mystery Shopping, which doesn't include payments that haven't been issued yet this month. Although some of that money is reimbursement (for things like meals I had to purchase) most of it is just income! So that brings my total Gift Budget up to $284! I do realize that #1 and #2 take quite a bit of planning, though, and it's kind of too late to catch up if you haven't already started with Paid-To Sites and Mystery Shopping (though do sign up now and start earning for next year!) So here's some stuff you can start doing TODAY.
Even more Gift Wrap Ideas!

3.  Do you have a computer and some extra time? (Obviously you do if you're reading this, that was rhetorical.) Why not write your favorite companies to get some free stuff? Sure, some of them just send coupons - but some of them send coupons for FREE products, or gift cards! Example: I had a gross muffin at Panera, so I wrote them describing in great detail the grossness of that muffin. One week later, I had a sweet hand-written card with a $10 Panera Gift Card folded inside! That gift card will be someone's Christmas present! (Friends who are reading this: GO AWAY.)  You can write with either genuine compliments or complaints - you'll typically get a response for either, as companies are very invested in keeping their loyal customers by rewarding them for their loyalty. Some of the best companies I've had responses from are White Castle (coupons for 6 free burgers!) and Starbucks (free drink coupons!). I'd also  recommend trying Panera, Kohl's, Qdoba, or wherever you shop or eat the most. Just be genuine and talk about your relationship with that retailer or company! They usually respond quickly, so you should be getting some good stuff to use as gifts before Christmas. Let me know which companies respond with the best stuff!

4. Ok, let's talk about stuff you can do RIGHT NOW. Well, maybe after a trip to the store. These are tried and true gifts that stand the test of friendship: delicious edible gifts. Get ready to become your circle of friends' Paula Deen. (Yes, Paula Deen. PS, my boyfriend tried deep-frying balls of cheesecake, and apparently it was delicious and everyone loved it. So I'm not including that on the list, because gross, but technically  that could be a pretty good gift. I will refer you to him if you have questions regarding anything deep-fried.) While baking cupcakes or cookies is always nice, these edible gift ideas are simple, unexpected and cheap - plus, no baking skills required.
    Super simple chocolate dipped pretzels!
  1. Chocolate Dipped Pretzel Sticks These are super easy to
    Bourbon balls or truffles are delicious simple gifts.
    Chocolate-dipped Marshmallows rolled in graham crackers.
    make, with minimal ingredients which means not very expensive. You'll need a bag (or two) of pretzel rods, some chocolate to melt (look in the baking aisle - chocolate for candy-making is best, but you can use chocolate chips too) and whatever toppings or decorations you want: white chocolate, sprinkles, mini m&ms, crushed up oreos, etc. Get creative! Here are some
    detailed instructions, but it's super easy: all you do is melt some chocolate, dip a pretezel rod in that chocolate, roll it around in some toppings, and then lay it out to dry. SO FREAKING EASY. A quick Google search for "Chocolate Dipped Pretzel Sticks" turns up a million results with some great ideas about what to dip them in and how to package them nicely (I just stuck a bunch in saran wrap and tied it at the bottom with a pretty ribbon.) These are a hit with just about everyone and 1-2 bags will yield more than enough pretzels.
  2. Chocolate Dipped Everything Anything is better dipped in chocolate. And it's SO FREAKING EASY to dip stuff in chocolate, so why not get creative? Snag some coffee stirrers from Starbucks (free Popsicle sticks!) and stick them into Bananas, Twinkies or Oreos (and then dip them in chocolate, obv.) Dip some Marshmallows in chocolate and roll them in crushed graham cracker crumbs for S'mores on a Stick. How about  apples or dried fruit of any kind? Plain sugar cookies? If you can eat it, you can dip it in chocolate. Let your inner Paula Deen go wild!
  3. Give the Gift of Balls There are so many kinds of balls that you can make this Holiday Season. First, watch the SNL Shweddy Balls skit to get you in the mood. Now that you're ready to make some balls, how about Cake Pops? Just bake a cake, crumble it up, mix it with icing and roll into balls that you can then dip in chocolate. (Tip: use LOTS of icing to hold the cake crumbs together.) Or how about Brownie Balls? Same idea: make brownies, crumble brownies, mix with icing, dip in chocolate! What about Chocolate Truffles? Truffles are easier than they look (only 3 ingredients, really!), DELICIOUS, and can be customized to just about anyone's taste. If you don't believe me, here's a giant list of truffle recipes. Here are some Oreo truffles, or perhaps you could customize your truffles with a liquor. Are you a peanut butter person? Make some Buckeyes! If you're from Kentucky, you've probably had Bourbon Balls before - did you know they're super easy to make? Here's another recipe to try. Make sure you have some powdered sugar or sprinkles on hand to dip all of these delicious balls into.

5. Are you over 21? If so, these gift options are for you. Alcohol makes a lovely gift. And no, we don't mean bringing over a 30-pack of Natty Light to the Christmas party. Have some class, really. These ideas will not only result in the best Christmas gifts ever, but they'll get your friends/family so drunk they won't even remember that you didn't get them anything else!
Skittles Vodka! Easy, pretty and delicious.

Infused Vodkas
  1. Skittles Vodka As easy as it sounds, this is basically vodka + skittles = delicious skittles flavored vodka! Here's a how-to recipe. All you do is add some color-separated skittles to some vodka and let it sit for a while. You'll need to strain the skittles chunks before you serve it to your friends, but that's pretty much the hardest thing about this super-simple gift idea. Try jazzing it up with tropical skittles for a beautiful rainbow array of flavors and colors! I'm packaging my Skittles vodka in miniature $1 wine bottles I got from Kroger, but any capped bottle or container you have will do just fine. Just remember, you'll need one container for each color/flavor. Once you've completed your Skittles vodka, mix it with some Sprite for a super easy, super delicious mixed drink!
  2. Infused Vodkas if Skittles don't float your boat, you can infuse vodka with a million other things, and it's really, really easy. Here are some guidelines.  You can keep it simple (fruit + vodka, ginger root + vodka, cucumber + vodka, Rolos + vodka...) or make it more complex (habanero bacon vodka, perhaps?) Search Google or TasteSpotting.com to find some awesome recipe ideas. Just allow about a month for the infusion to penetrate the vodka.
  3. Apple Cider Moonshine No, it's not really "moonshine," but it's a simplified version of this classic recipe made with straight grain alcohol such as Everclear. Before you instinctively vomit everywhere remembering the last time you had Everclear, hear me out. Here's the recipe. Essentially, you'll add Apple Juice to Apple Cider, boil it in a pot with a lot of sugar and a lot of cinnamon, cool it off and then add an entire bottle of straight grain alcohol. I made this last week and I can verify that it is, indeed, delicious.Your apartment will smell like apple pie and your friends will be drunkenly amazed at your skills. I bottled all of mine in leftover recycled pasta and jam jars that I intend to decorate!
  4. Homemade Cordials and Mixers On this page you'll find recipes for everything from homemade Irish Cream to Sweet-N-Sour Mix. Here are recipes for Homemade Liqeuors. There are so many options, you'll be giving alcohol gifts for YEARS to come!!
6. By now there are probably some angry freshman who want to kill me for not including any gifts that don't require a kitchen. (You can microwave the chocolate, guys.) Anyway, just to be fair, here are some gifts that DON'T require any sort of kitchen equipment!
This is my boyfriend modelling his DIY shirt.
  1. Customized T-Shirts Everyone loves those shirts on Threadless or similar. But the problem is, they cost money. Not to worry - making your own graphic t-shirts is easy and not that expensive! Think of the possibilities: a picture of your and your friend; an inside joke; a reference to your friend's favorite movie or TV series; lyrics to your friend's favorite song; something really silly, insulting and/or dumb - there are SO many directions you could go with this. Customizing a t-shirt can be done in a few different ways: iron-on transfer paper, stick-on letters, or plain ol' paint and markers. Head to your closest craft store such as Hobby Lobby or Michael's (be sure to search for and print out the weekly 40% off coupon first, though!) and locate the t-shirt decorating aisle. You can buy plain t-shirts here, or you can go to Goodwill or the Salvation Army. Anyway, look for iron-on transfer paper if you want to print out an image for your shirt. You'll need access to a printer and an iron for those. If you just want words, get some iron-on or stick-on letters - you'll want stick-on if you don't have an iron. There should also be fabric paint and fabric markers - you can decorate the shirt freehand! The picture you see to the right there is actually my boyfriend modelling his creation for Minecon 2011.
  2. Get Crafty There are lots of gift ideas that only require some basic crafty skills and materials. How about making a Reasons Why I Love You booklet? Here are some examples using a deck of cards: Example 1, Example 2. Here are some other examples: Example 1, Example 2.These make great gifts for your boyfriend/girlfriend, and are a step above a mix CD or playlist. (Not that those aren't cool too.) They'll also work for your friends! Here's another idea: make a collage using pictures of you and your friends! Just print out your favorite pictures from Facebook and paste them onto a big sheet of poster board with some cute cut-outs from magazines and quotes. Or if you're no good at collages, make a Memory Board: Cover some foam board in pretty fabric and pin ribbons criss-crossing on top of the board to make a cute way to display pictures! You can decorate it however you like, or leave it blank for your friend to customize themselves. How about making some Custom Magnets by gluing pictures or jewels onto magnet backings purchased at a craft store? There are tons of ideas out there! Here are some tutorials, some more tutorials, and a forum filled with gift ideas. Happy searching!
  3. Salt and Sugar Scrubs are easy and make great gifts.
  4. Bath & Beauty Gifts Bath and beauty stuff is so easy to make. Whether you purchase a melt and pour soap-making
    kit at Michael's or opt for making a simple salt or sugar scrub, there are tons of ideas out there. Here are some good tutorials. Some of my personal favorites are Bath Bombs, Lip Balm or Gloss, and Salt or Sugar Scrubs. The last one is really the easiest - just mix olive oil with sea salt or sugar, and add a scent! Here are a bunch of Sugar Scrub recipes. Surprisingly, you can find good ingredients for DIY beauty projects at the Dollar Tree, including Sea Salt (food aisle), Epsom Salts (bath aisle) and scented oils (in the candle aisle)
Cute comic wrapped gifts! Great for kids.
Ok. Hopefully at least ONE of those suggestions inspired you. And remember, gift wrapping is cool and all, but recycling a brown paper bag and tying it with a pretty ribbon is cheaper, more environmentally-friendly, AND looks more unique and super classy. Or try using recycled Sunday comics papers or magazine tears! There are so many ways to give awesome gifts to your friends, but if you still can't afford any of the ideas above, don't sweat it. Your friends/family will understand and forgive you for being broke as a joke. I have a friend who is a music major, and every year she writes and performs personalized songs for her loved ones. I've received hand-made cards with heartfelt notes in lieu of gifts, and it was sweeter than any store-bought trinket. Just because you can't afford to buy *stuff* doesn't mean you can't show your loved ones that you care about them. So relax! The Holiday season is meant to be fun and enjoyable, and there are many more things to enjoy and be thankful for than giving and receiving gifts.  As always, let me know if you have any questions about anything in this post, and please comment with gift ideas not listed here!

Want to know about new freebies, samples, deals and money-saving as soon as they happen? Follow The Broke Student's Guide on Facebook, Twitter and Tumblr.
Related Posts Plugin for WordPress, Blogger...